How to Make Musical Instruments for Kids

Shake it up with this pie pan tambourine!
©2007 Publications International, Ltd.

Music ties together all of humanity, and learning how to make musical instruments gives kids a deeper understanding of music's power. Making musical instruments for kids is also a fun activity that parents and kids can do together!

Take that important first step toward musical bliss with the crafts and activities in this article. There are many types of musical instrument crafts to choose from, and you're sure to find something to spur your kids' musical instincts.

Advertisement

Cardboard Guitar Craft

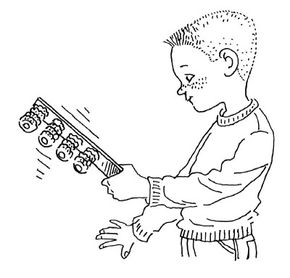
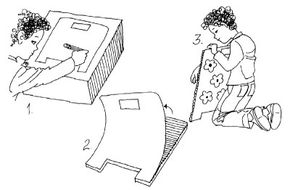
Think you've got something on Jimmy Page, Slash, or Keith Richards? Emulate your favorite guitar hero with this fun cardboard guitar craft.

Musical Can Activity

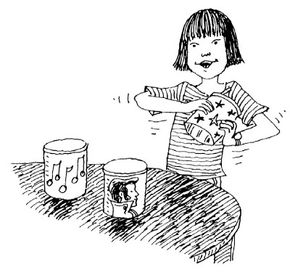
Learn how to shake up some music with this musical can activity.

Fish Line Music Board Craft

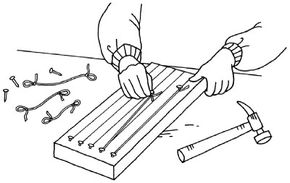
Go fishing for some music with this fish line music board craft.

Glass Jar Music Activity

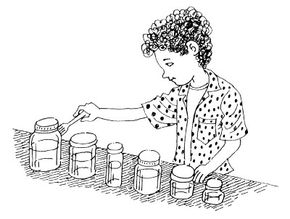
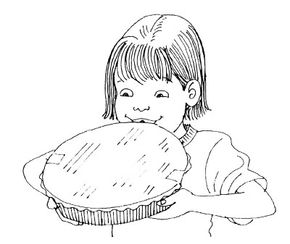
Take a little bit of water and some empty glass jars and you can easily create a tonal symphony.

Pie Pan Tambourine Craft

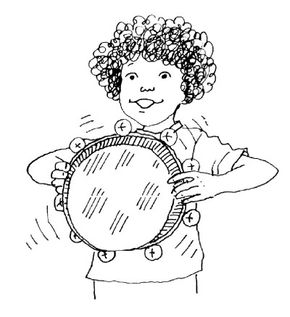
Learn how to make a tambourine from some old pie pans and shake out some beautiful music.

Musical Chimes Craft

Do you have a few spare nails and a wooden board? Try this musical chimes craft and get ready to make some "heavy metal" music.

Bottle Cap Clinkers Craft

Rattle and roll with this bottle cap clinkers craft. All you need are a few spare soda bottle caps!

Humming Instrument Craft

Hum along to all of your favorite songs in no time with this humming instrument craft.

Cardboard Washboard Craft

Get into the rhythm with this cardboard washboard craft. It's guaranteed to produce some swinging sounds.

Wood Tap Musical Craft

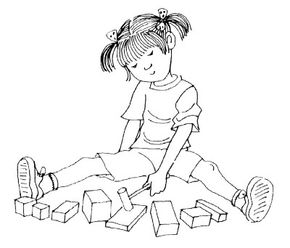
Bang out some authentic notes with this wood tap musical craft. All you need is a hammer and some wood blocks.

Become a cardboard guitar hero with the craft on the next page!

For more fun crafts and activities, try:

Advertisement

Cardboard Guitar Craft

Rock out like a guitar hero!
©2007 Publications International, Ltd.

This fun cardboard guitar can make pretending fun. It's like playing air guitar -- with a little more than air to wrap your fingers around. Try this cardboard guitar craft and watch kids pretend to be their favorite rock stars -- or form their own "air band!"

What You'll Need:

  • Cardboard appliance box
  • Pencil
  • Scissors
  • Glue
  • Tempera paints
  • Paintbrush
  • Metallic felt-tip marker
  • Straight pin
  • Fishing line
  • Duct tape

Step 1: Draw a life-size guitar on the long end of an appliance box. You can make an acoustic guitar or an electric guitar shape.

Advertisement

Step 2: Trace around the neck of the guitar on cardboard to make another neck; make this one a bit longer than the original.

Step 3: Cut both pieces out, and glue the second neck to the back of the first neck. This will reinforce your guitar so you can strum wildly! If you've made an acoustic guitar, cut out a hole in the body of the guitar, so it looks like a real guitar.

Step 4: Paint your guitar however you'd like. You can add your band's name, logo, or whatever you want. Try some psychedelic colors!

Step 5: When the paint is dry, draw frets (the lines along the neck of the guitar) with the metallic felt-tip marker.

Step 6: With a straight pin, make four small holes for an electric guitar or six small holes for an acoustic guitar along the top of the neck and four or six holes at the bottom third of the body of the guitar.

Step 7: Measure the length from the top holes to the bottom holes, and add four inches.

Step 8: Cut four or six pieces of fishing line that length. Thread a piece of fishing line through the front of a top hole, and tape the line down on the back of the guitar with duct tape; repeat for the bottom hole. Do the same with the other holes and other pieces of line.

Now your kids are ready to jam -- turn on the radio and watch them play along!

Find out how to make extraordinary music on the next page.

For more fun crafts and activities, try:

Advertisement

Musical Can Activity

Take an everyday coffee can and make beautiful music.
©2007 Publications International, Ltd.

This musical can craft will certainly help kids keep the beat. The magic of music is not just in the tune; it's in the rhythm. This coffee can trio of rhythm instruments can help kids play along with any of their favorite songs.

What You'll Need:

  • Three small metal coffee cans with lids
  • White paper
  • Colored markers
  • Old magazines
  • Scissors
  • Glue
  • Measuring cup
  • Uncooked pinto beans
  • Popcorn (that has not been popped)
  • Uncooked rice
  • Heavy-duty tape

Step 1: Wash and dry the coffee cans.

Advertisement

Step 2: Decorate three sheets of paper with colorful drawings of musical notes or fun shapes. You can also use old magazines to cut out pictures of your favorite musical legends or stars, and glue them on the paper.

Step 3: Glue your design to the outside of the coffee can, covering the brand name and logo.

Step 4: Now put one half cup of uncooked pinto beans in a can, one half cup of uncooked popcorn in another, and one half cup of uncooked rice in the third.

Step 5: Pop on the plastic lids, and make sure they are securely in place. Tape the lids in place with heavy-duty tape. Now it's time to shake, shake, shake your way to musical adventure.

Notice how different the sounds inside each can are, thanks to the different shapes and densities of the contents.

Kids will go "pluck wild" for the fish line music board on the next page.

For more fun crafts and activities, try:

Advertisement

Fish Line Music Board Craft

Make sure the line is stretched tight.
©2007 Publications International, Ltd.

Try this fish line music board craft, and kids will be strumming away in no time! This activity has some steps you'll definitely want to help your kids with.

What You'll Need:

  • Smooth board, 16 x 6 x 1 inches
  • Pencil
  • Ruler
  • Hammer
  • Ten one-inch nails
  • Scissors
  • Nylon fishing line

How to Make a Fish Line Music Board:

Step 1: Lay a 16 x 6 x 1-inch board flat on the table in front of you so that one of the six-inch sides is nearest you.

Advertisement

Step 2: Draw five straight pencil lines down the length of the board about one inch apart, beginning one inch down from the top and one inch in from the left side.

Step 3: Pound a nail about one half inch deep at the top of each line (you may want to do this for your kids).

Step 4: Cut five pieces of nylon fishing line in the following lengths: 14, 12, 10, eight, and six inches. Tie a loose slip knot in both ends of each piece of fishing line.

Step 5: Put the slip knot of the 14-inch piece of fishing line over the top left nail on your board, and pull the knot tight.

Step 6: Put the slip knot at the other end of the fishing line over a loose nail, and stretch the line as tightly as you can toward the bottom of the leftmost pencil line that you drew.

Step 7: Hammer the nail into the board about one half inch deep. Nail the other pieces of fishing line onto the board in the same way.

Step 8: Work from left to right on the board, each time using the longest piece of fishing line that you have left.

You now have a musical instrument. Pluck each string with your index finger. Which string has the highest sound? Which has the lowest?

Practice with your new instrument, and use it to make music.

Continue to the next page and learn to make music using ordinary glass jars.

For more fun crafts and activities, try:

Advertisement

Glass Jar Music Activity

Your glass jars will sing beautiful notes.
©2007 Publications International, Ltd.

Try this glass jar music activity and see how water can help make music.

What You'll Need:

  • Six to eight different-size glass jars with lids
  • Water
  • Metal fork

Step 1: Gather together six to eight different-size glass jars with lids.

Advertisement

Step 2: Fill each jar half full of cool water, and tightly close the lids. Use a metal fork to gently strike the jars.

Can you hear the music ring? Do all the jars sound the same? Does the music change when you strike the top, middle, or bottom of the jar?

Step 3: Pour out half the water in each jar, and repeat the experiment. How have the tones changed?

Step 4: Once you're familiar with what note each of your jars will play when softly hit, you can try to play your favorite tunes.

Make a rhythmic tambourine from old pie pans in the activity on the next page.

For more fun crafts and activities, try:

Advertisement

Pie Pan Tambourine Craft

A finished pie pan tambourine in action.
©2007 Publications International, Ltd.

If keeping time to the music is your kids' favorite pastime, have them ring in some fun with this easy-to-make pie pan tambourine. You'll need to help them with a few of the steps here.

What You'll Need:

  • Foil pie pan
  • Nail
  • File or hammer
  • Jingle bells
  • Yarn or string

Step 1: Punch holes in the edges of an aluminum foil pie pan with a nail. Help kids smooth the sharp edges of the holes with a file or hammer.

Advertisement

Step 2: At each hole, tie a small jingle bell to the pan with yarn or string. Now jingle those bells -- you'll have a rhythmic adventure you won't be able to resist.

Continue to the next page and learn a pleasant musical chimes craft.

For more fun crafts and activities, try:

Advertisement

Musical Chimes Craft

Even when no one is playing these musical chimes, the wind will make beautiful music for you. This musical chimes craft will help kids nail down some delicate notes.

What You'll Need:

  • Six-inch block of wood
  • Sandpaper (optional)
  • Paint
  • Paintbrush
  • Markers
  • Stickers
  • Cord or yarn
  • Scissors
  • Different-size nails
  • Metal dowel

Step 1: Find a long, flat block of wood that is about six inches long. Use sandpaper to smooth the wood if needed.

Advertisement

Step 2: Paint or decorate the wood with markers and stickers.

Step 3: Cut eight to 10 pieces of cord or yarn, each about 12 inches long. Tie a piece of cord or yarn every half inch along the block of wood. Trim the ends of all the cords so they are even.

Step 4: Tie the different-size nails on the dangling ends of the cord. Cut another length of cord for a hanger, and tie each end to an end of the block of wood.

Step 5: Hang your chime from a porch or window. Stroke the dangling nails with a metal dowel for a lovely, tinkling sound.

Continue to the next page and read about our bottle cap clinkers craft. Kids will be shaking up some noise in no time.

For more fun crafts and activities, try:

Advertisement

Bottle Cap Clinkers Craft

Make some noise with this fun bottle cap clinker.
©2007 Publications International, Ltd.

Kids will shake up some fun and rhythmic beauty with this bottle cap clinkers craft. This clinking rattle will bring a whole new sound to your life.

What You'll Need:

  • Soda or beverage bottle caps
  • One large nail (larger than a two-inch nail)
  • Hammer
  • Two-inch nails with large heads
  • Long piece of wood
  • Sandpaper (optional)

Step 1: Collect dozens of bottle caps from old-fashioned glass soda or beverage bottles. Help kids use the biggest nail to punch a hole through the center of each cap.

Advertisement

Step 2: Once each cap has a hole, place four caps on each two-inch nail. Make between four and 10 nails with caps on them.

Step 3: Hammer the nails halfway into the wood, leaving the bottle caps free to jingle. (If the wood is rough, use the sandpaper to smooth it before hammering nails into it.)

Step 4: Shake the finished rattle for a distinctive sound. Shake, shake, shake it!

Use the humming instrument craft to amplify voices -- keep reading to find out how!

For more fun crafts and activities, try:

Advertisement

Humming Instrument Craft

Amplify your voice with this humming instrument.
©2007 Publications International, Ltd.

This humming instrument craft may very well bring the house down. Create this musical craft with your kids and hum your favorite tunes.

What You'll Need:

  • Waxed paper
  • Foil pie pan
  • Scissors
  • Tape

Step 1: Cut a circle of waxed paper that is two inches larger than the top of a foil pie pan.

Advertisement

Step 2: Place the circle on top of the pan, and press the excess paper down over the sides of the pan.

Step 3: Tape the paper onto the pan at two opposite points only.

Step 4: To play, place your lips lightly against any edge of this instrument. Hum a tune, and watch the paper vibrate to amplify the sound.

Make a washboard from cardboard, and then make music with it! Find out how on the next page.

For more fun crafts and activities, try:

Advertisement

Cardboard Washboard Craft

Be sure to follow each of these steps to create a fun cardboard washboard craft.
©2007 Publications International, Ltd.

Make a cardboard washboard for a musical treat. The washboard is a scratch-and-thump rhythm instrument that is a special favorite in bluegrass and folk music. Show kids how they can make a cardboard version of this down-home instrument.

What You'll Need:

  • Corrugated cardboard box
  • Pencil
  • Heavy-duty scissors
  • Paint
  • Paintbrush
  • Glue

Step 1: Using the illustration as a guide, draw two washboard shapes on the side panel of a large corrugated cardboard box. Make sure you draw and cut out rectangular holes at the top of the instrument.

Advertisement

Step 2: Cut out the washboards, and paint one.

Step 3: On the unpainted washboard, peel off the top layer of paper to expose the corrugated ridges. Glue this to the unpainted side of the other washboard. Let the glue dry completely.

It's time to make music. Rake your fingers across the bumpy surface to create a fun, scratchy sound.

Continue to the next page and learn how to bang out some notes with our wood tap musical craft.

For more fun crafts and activities, try:

Advertisement

Wood Tap Musical Craft

Hammer out some magnificent music!
©2007 Publications International, Ltd.

This musical wood tap craft is sure to result in a "tone" of fun. Learn how to make simple music with your kid using wooden blocks, and discover how the size and shape of each block affects your musical masterpiece.

What You'll Need:

  • Six to eight different-size and -shape wood pieces
  • Small hammer
  • Tape recorder (optional)

Do all wooden doors produce the same knock? Do all blocks of wood sound the same when they are rapped and tapped on? Do they sound identical to the doors? Of course not.

Step 1: Gather up six to eight wood pieces that are different sizes, shapes, and colors.

Step 2: Tap twice on the first block of wood with your hammer. Listen carefully so you'll remember the tone.

Step 3: Tap on the second. Then the third, and continue until you've tapped on all the blocks.

Step 4: Line up the blocks in musical order (highest-pitched tap to the right, lowest-pitched tap to the left.)

Step 5: Now "play" your wooden block instrument for a remarkable sound. For added fun, tape record your songs!

For more fun crafts and activities, try:

Advertisement

Loading...