When you start work on a creeping crystals science project, be careful. You may feel like a mad scientist when you see the results!
What You'll Need:
- Saucepan
- Water
- Measuring cup and spoon
- Epsom salts
- Mixing spoon
- Green food coloring
- Metal bottle caps
- Pie pan
- Strings
- Pennies
Step 1: Get an adult to help you heat 1/2 cup water in the saucepan over medium heat. Measure 1/2 cup Epsom salts, and mix salts in hot water by spoonfuls until no more dissolves. Turn off heat.
Step 2: Add 2 drops green food coloring, and stir. Let mixture cool for 20 minutes or more.
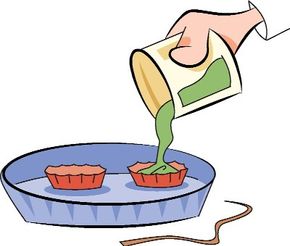
Step 3: Arrange the bottle caps in the pie pan. Carefully pour the warm solution into the bottle caps until the caps are full.
Step 4: Place strings in the caps. Use pennies to weigh down the strings so they can't float.
Step 5: Place the pan where the water will evaporate quickly. Warm areas with good airflow increase evaporation.
Step 6: Watch the caps for a few weeks for crystal growth. If a crust forms on the water's surface, use a pencil to make a hole so you can watch the crystals form.
What Happened? Epsom salts (magnesium dioxide) dissolve in water. Heating the water allows more salt to dissolve into the water. When you do this, you create what chemists call a supersaturated solution.
After the water is poured into the caps, it begins to cool. Now the water can't hold as much salt, and crystals begin to form. As the water evaporates, the crystals continue growing.
Look closely and compare a few grains of table salt and Epsom salt. You can see the crystals are different shapes. When large crystals grow, they are made out of the same repeated shapes.
For more fun science projects and activities, check out:
ABOUT THE DESIGNERS
Creeping Crystals Science Project by Peter Rillero, Ph.D.
Peter Rillero, Ph.D. is the Department Chair of Secondary Education and associate professor of science education at Arizona State University in Phoenix. He is the author of Time for Learning: Science; Time for Learning: The Human Body, and Totally Creepy Bugs, and the co-author of the best selling high school biology textbook in the United States. Rillero has conducted two program evaluations of the world's largest science fair, the Intel International Science and Engineering Fair. Visit Dr. Rillero's Web site.
Computer Illustration by: Rémy Simard